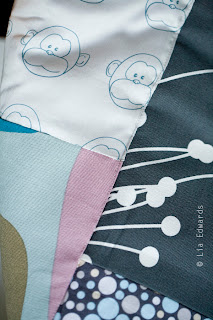
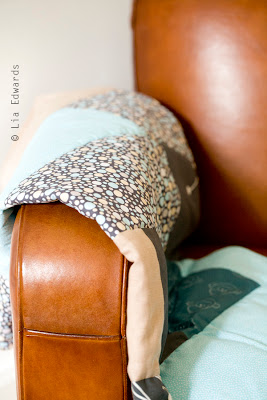
It's a lightly padded quilt that can go on the floor for the baby to lie/play on (I'm going to put a play arch or mobile over it). Since I love print and colour, I really wanted something that was playful, but would fit in with my home and look a bit funkier than the pastel fluffy bunny style or garish primary coloured fabric playgyms available at the baby stores. It's washable so saves you having to get the rug or carpet cleaned everytime the baby decides to make a mess while on the floor.
It was really easy to make - another Lotta Jansdotter pattern from her book "Simple Sewing for Baby". Basically you cut a number of squares and rectangles in various fabrics, the only requirement being that they are all 20cm wide, sew them into strips, sew the strips together and then back with padding and backing fabric. The full instructions are below. The finished quilt is approximately 98x98cm - big enough for baby and toys, but small enough to put in the washing machine.
I enjoyed making this so much, I even made a second one using different fabrics for another baby due later this year ; )
By the way, you see the fabric with the monkey pattern - that's my very own design and the first fabric I've had printed, very exciting! For more on that design, see this post: Surface Design Week 5.
Here are the instructions to make the play quilt.

Supplies needed:
* Cotton squares and rectangles (enough to create 5 x 100cmx20cm strips - see below)
* 100cmx100cm backing fabric (for e.g. a heavy linen or cotton)
* 100cmx100cm polyester wadding
* thread
* pins
* hand-sewing needle
* scissors
* iron
* point turner/knitting needle
* ruler and paper or fabric marker
Instructions:
1. Cut fabric squares and rectangles from your chosen fabrics. They can be different lengths, but must all be 20cm wide. I used a paper template which I pinned to my fabric before cutting it to make sure I got the width consistent. You could also just use a fabric marker to mark out the squares before cutting them. You'll need enough pieces to make 5 x 1m long strips.
2. Lay out your pieces into 5 strips. Once you are happy with how they are laid out you can begin sewing them together. Take the first two pieces, pin right side together and machine sew along the width on one edge (backstitching at the beginning and end). Then take the next piece in that strip and do the same. Repeat with all the fabric sections until you have 5 x 1m strips (trim the strips if necessary to get the same length).
3. Then you need sew the strips together in the same way - pin the first two strips right side together and machine sew along the length, back-stitching at the start and finish. Then repeat with the next strip until you have all 5 strips sewn together.
4. Measure out your backing fabric (I used a heavy linen from Ikea) and polyester wadding to the same dimension as your patchwork piece (100x100cm).
5. Pin the polyester wadding to the wrong side of the backing fabric and baste/tack together (i.e. stitch temporarily with long stitches by hand) around the entire quilt.
6. Pin the heavy fabric and pieced fabric, right sides together (the polyester wadding will be on the outside) and machine stitch all the way around (back-stitching at the beginning and end), leaving a 15cm opening on one side. You can now remove the tacking stitches.
7. Trim all seam allowances to 6mm (except at the opening), clip the corners at 45 degree angles and turn the quilt right side out (using a point turner or knitting needle to push out the corners). Press the seam edge flat with a medium hot iron.
8. Fold under and press the seam allowance at the opening, slipstich or pin in place and then machine sew around the edge of the whole quilt.
9. Then it's up to you how you want to quilt the blanket. I simply did a "stich in the ditch", machine sewing along the lengths of the pieced seams.
Voila - my funky floor play quilt. Fun for baby, practical and not offensive to the eye!


