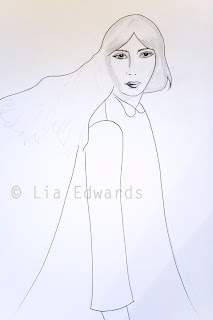
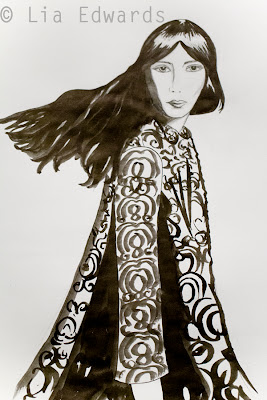
This first week was all about finding inspiration, seeing patterns and shapes around you and sketching ideas and motifs from that inspiration. I've loved everything I've learnt this week. And there's still 4 weeks left of Module 1!
Here are the various tasks I got up to over the last week.
1.1: Getting started
This exercise involved taking stripes or circles as the theme and creating a simple pattern from either taping patterned tape onto a sheet of paper and drawing over it, or alternatively using a hole punch to punch holes in a piece of paper and then use that to draw random circle patterns on another sheet of paper.
I chose the circle exercise and made the pattern above by drawing spiral shapes all over a sheet of paper through a piece of hole-punched paper, then I created "branches" to attach the spiral shapes (which I thought looked like blossom or small roses). Finally I scanned the image into Photoshop and added a yellow background (leaving the flowers white). All pretty simple, but a fun way of getting started.
1.2: Shapes around us
The aim of this exercise was to get us seeing the shapes that are everywhere around us. The first part of the exercise was to pick a shape (I chose circles again) and go out and photograph things of this shape. I took over 100 photos in my local neighbourhood of various circular shapes. These are some of my favourites:
The second part of this exercise was to make sketches from a natural form (e.g. tree, flower, leaf), focusing on the shapes in that form. I chose this photograph I took of a flower in the botanical gardens here in Munich as my inspiration. I liked its structured, layered form.
I'm not very good at quick, simple sketches straight from a photograph, so to start with I did quite a detailed pencil sketch. Although this was time-consuming, it enabled me to really study the shapes and forms that made up the flower. Once I was happy with the pencil sketch, I went over the lines in black pen to help simplify the elements making up the flower.
Then, using my pen drawing as reference, I did some much quicker drawings, just focusing on the main shapes, or one particular area or the overall outline. I think the time I had spent on the original drawing had really helped train my eye to the key shapes. I don't think I would have been able to draw these "simple" versions without having done the more detailed versions first. But maybe I should give it a go next time!
1.3. Interview with Abigail Borg
Part 3 of the course this week treated us to a recorded interview with surface designer Abigail Borg. You can see her beautiful work here: http://www.abigailborg.co.uk/
I love how she does detailed drawings by hand, then assembles them and colours them digitally. That is a similar process to what I have recently been experimenting with and I really enjoy that method of working. The thing I found particularly interesting was how she talked about not being able to do quick sketches. She prefers to work in a more detailed manner. It might be more time-consuming, but as you can see from her beautiful fabrics, the results are worth it. That makes me feel a whole lot better about spending 2 hours on one drawing!
1.4. Motifs - Deconstructing a Pattern
The next task was to take a pattern from fabric or some other surface at home and deconstruct it, drawing the various different elements making up the pattern.
I chose this Liberty fabric, which I've had in my fabric stash for a while. I love the simple outlines of the flowers and the muted colours of lilac, grey, taupe and eau de Nil. There are about 30 different floral motives repeated throughout the pattern. Here's a section of the fabric:
... and my "deconstruction" of some of the elements of this pattern:
Drawing some of the flowers making up the design, I realised how intricate each one is. They are clearly based on observation of real life flowers, but shapes and shaded areas have been simplified or stylised resulting in graphic representations of the lines and forms of the stamen, petals and stems. Clearly a LOT of work has gone into this design.
1.5. Photoshop Workshop
Using Rachael Taylor's step-by-step Photoshop tutorial, I learnt how to scan in a hand-drawn motif and repeat it on a page. This isn't a technical (i.e. seamless) repeat just yet, but it's the basics of manipulating a motif and repeating it on a new file. I'm looking forward to when we learn more about combining motifs into a pattern, playing with scale and adding colour.
1.6. Mark-making and Motif Development
Next it was time to get exploring "mark-making", i.e. experimenting with different media to create marks on the page. I started with this photograph of the shadow of a bike wheel, which was one of the pictures I took for exercise 1.2:
I wrote down a few words that came to mind looking at the image and then made lots and lots of sketches based on various elements of the image, first in pencil and pen, filling the whole page, then playing with scale and repetition.
Two particular motifs emerged, both simplified versions of the shapes from the bike wheel shadow. I then explored these further using different thickness of pens, charcoal pencil, pastel and ink. I was surprised to find I really liked the texture in the pastel ones. I'm not normally a pastel fan, but using black pastel has given me a new perspective on the textures you can get with this medium.
I'd love to develop these ideas further in Photoshop, and experiment with adding in a few different motifs (based on the other circle inspiration photos) in different scales.
Summing up
I feel like I've learnt so much already in the first week of this course. Thank you, Rachael!! It's really got me seeing shapes and patterns around me and I'm enjoying learning how to develop a motif and work on it in Photoshop. I feel really motivated and can't wait for the rest of the course!


.JPG)
.JPG)
.JPG)
.JPG)
.JPG)
.JPG)

.JPG)
.JPG)
.JPG)
.JPG)
.JPG)
.JPG)
.JPG)
.JPG)
.JPG)
.JPG)
.JPG)


